Recently I was working on a Hugo website and all was just funny when the publish stage came. Searching on Google I didn’t found a way to automate the deploy of an Hugo’s site to any shared hosting. All I could found was related to use GitHub Pages and Netlify, even in Hugo’s official documentation. I wanted to publish it in the same hosting I was already paying for.
Table of Contents
In this post I will explain the process I followed to get an Hugo’s website deployed automatically at pushing a change to a GitHub repository to a shared hosting in an very easy way. In fact, the process is pretty similar to get it done in GitHub Pages.
The process might vary depending of the shared hosting you have, but you should be able to find the right options. I will be using Hostinger, which uses hpanel, and as you might guess from the title, GitHub as version control system as well as GitHub Actions to automate the process.
What is Hugo?
Hugo is a fast and modern static site generator written in Go, and designed to make website creation fun again.
https://gohugo.io/about/what-is-hugo/
I based on Toha‘s documentation, which is an awesome Hugo template which you can use to make you own portfolio online, due to it is very clear and easy to understand. I just made the needed changes to work for that I wanted. You can see its the original documentation here.
You can also check Hugo’s official documentation to publish your Hugo site on GitHub Pages here.
At this point, you should already have Hugo website created and stored in a GitHub repository. For demonstration purposes I will be using PaperMod theme with basic content.
I will be using a subdomain for this process. I called “testing” the new subdomain. Also, I set it to use the folder “testing” to store the files for this subdomain. Is important to know this to understand the configuration made:
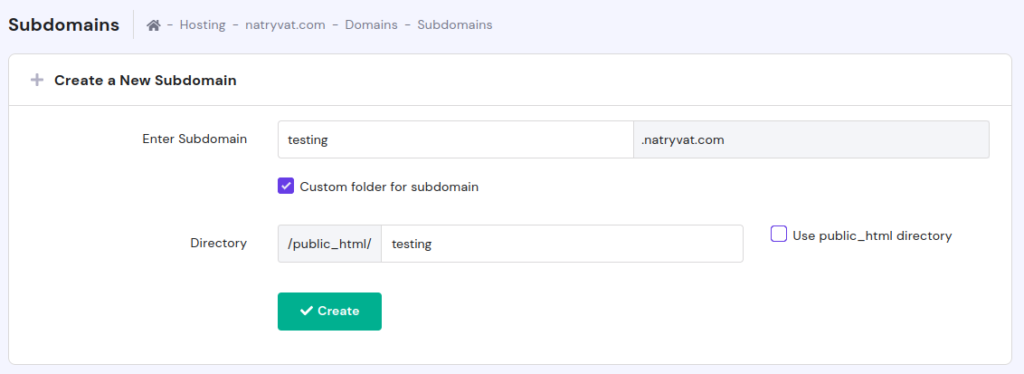 Adding new subdomain to host website.
Configuring GitHub Actions
As I mentioned before, I will be using GitHub Actions to automate automation workflow.
The first thing we need to do is to create a folder called “.github” in the root of our project. Inside of it, another one called “workflows“. Now, we create a file called “deploy-site.yaml” with the following content:
name: Deploy Hugo Site

# run when a commit is pushed to "master" branch
on:
  push:
    branches:
    - master

jobs:
  deploy:
    runs-on: ubuntu-20.04
    steps:
    # checkout to the commit that has been pushed
    - uses: actions/checkout@v2
      with:
        submodules: true  # Fetch Hugo themes
        fetch-depth: 0    # Fetch all history for .GitInfo and .Lastmod

    # install Hugo
    - name: Setup Hugo
      uses: peaceiris/actions-hugo@v2
      with:
        hugo-version: '0.93.2' # Version to compile Hugo, best is to use same as local
        extended: true

    # build website
    - name: Build
      run: hugo --minify

    # push the generated content into the `deployed` branch.
    - name: Deploy
      uses: peaceiris/actions-gh-pages@v3
      with:
        github_token: ${{ secrets.GITHUB_TOKEN }}
        publish_branch: deployed # Branch which will store compiled version
        publish_dir: ./public
I think the file is self-explanatory, but if you are wondering what it does:
- It waits for a commit to come to master branch.
- Then, it sets up the machine which will integrate and deploy the code, it specifies the machine OS and the version of Hugo which will be installed.
- Declare the command to create the static website.
- Finally, it update the changes to deployed branch.
At this point you can make the commit for the new file, but wait to configure the remaining tools before pushing the changes to GitHub.
Apart from that, we also need to make sure our shared hosting can communicate with Github and has the right permissions. To do that, we need to go to GIT option from our shared hosting panel (hpanel in this case).
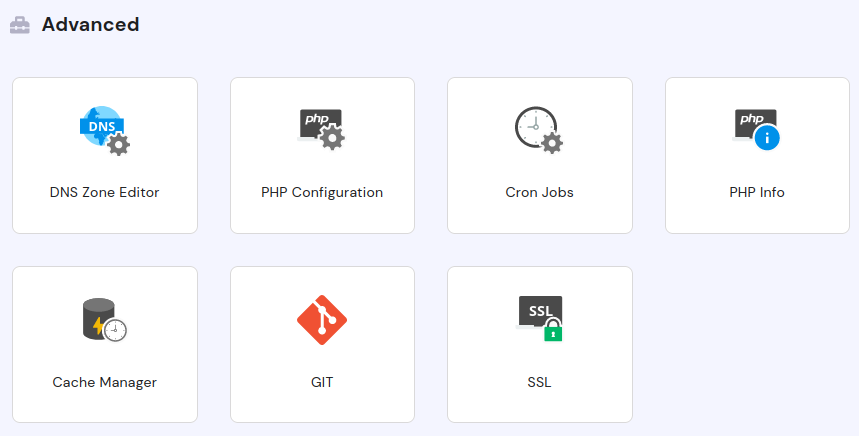 Advanced options from Shared Hosting panel.
There we just need to create a new repository, the branch is set to “deployed“, as it was specified so in the “deploy-site.yaml” file:
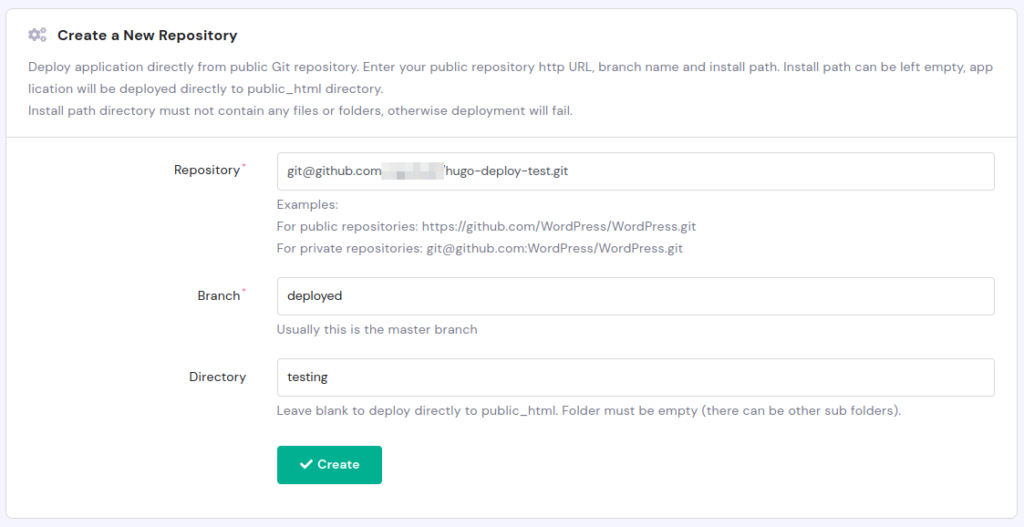 Create new repository in shared hosting.
Configuring SSH for private repositories
In case the repository is private (as mine), we also need to configure a SSH key to allow shared hosting to access the source code. This option should the in the same GIT option from shared hosting panel:
 Generate SSH Key option.
There we just need to click in “Generate SSH Key”:
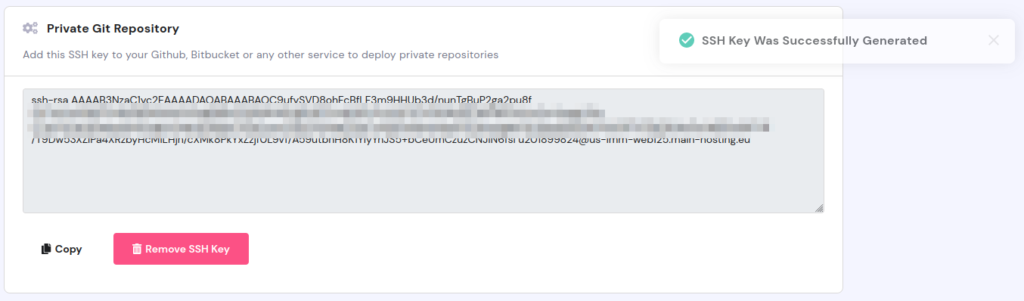 Generating SSH Key.
Once created, we just have to add it to GitHub SSH Keys. The steps to access to this setting are showed in image below:
 SSH Keys section on GitHub.
There we just have to give a name to the key, paste the key and save:
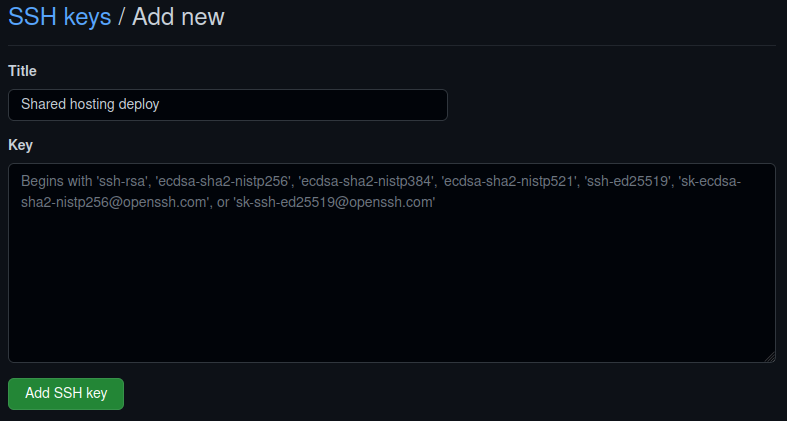 Adding SSH Key to GitHub.
Auto Deployment to shared hosting
From last step, we should now have the repository. Here we have two options, deploy the site just one, or auto deploy the site when we commit a change, which we want.
 Deploy options from repository.
If we click on that second option, we are given with the instructions to setup the webhook which is needed to communicate GitHub to the sharing hosting when a change is made:
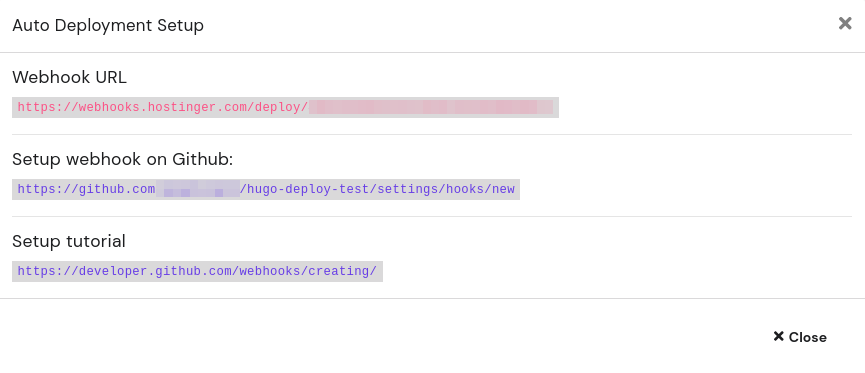 Instructions to set up Webhook.
What we need to do is just copy the Webhook URL and click in the second click, which redirects to our GitHub repository settings. We just need to paste the URL and click on “Add webhook”, default settings should work fine:
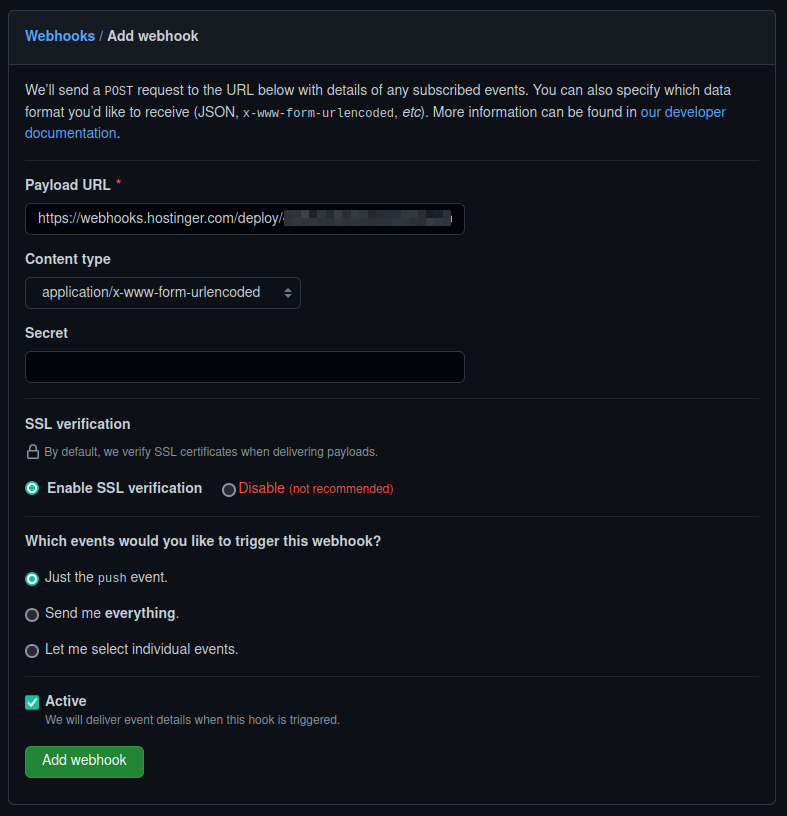 Configure Webhook in GitHub.
Now we are in the repository settings, we can verify Actions is allowed in the repository:
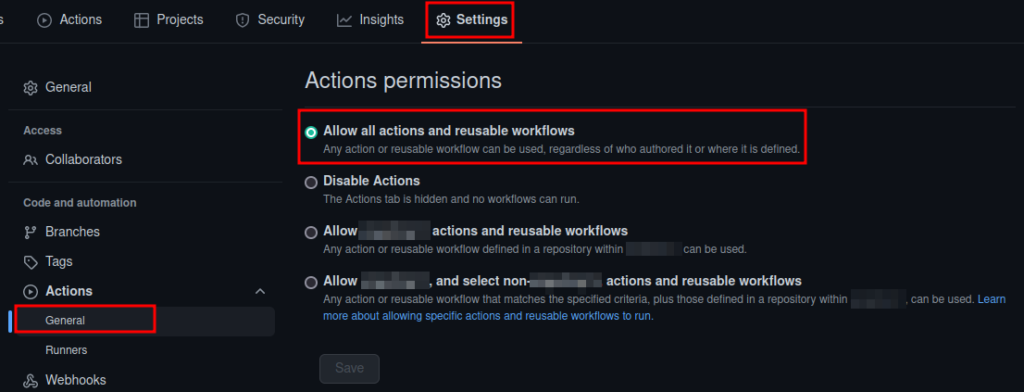 Verify actions are allowed on GitHub repository.
Push changes to GitHub
Finally, we can push the last commit to GitHub, Actions should start automatically:
 GitHub Actions started.
The first time, GitHub Actions could take a long time to find an available runner, which is the remote machine in charge of deploy/render the website.
Also, accessing to the domain/subdomain the configured, it should now have the page hosted:
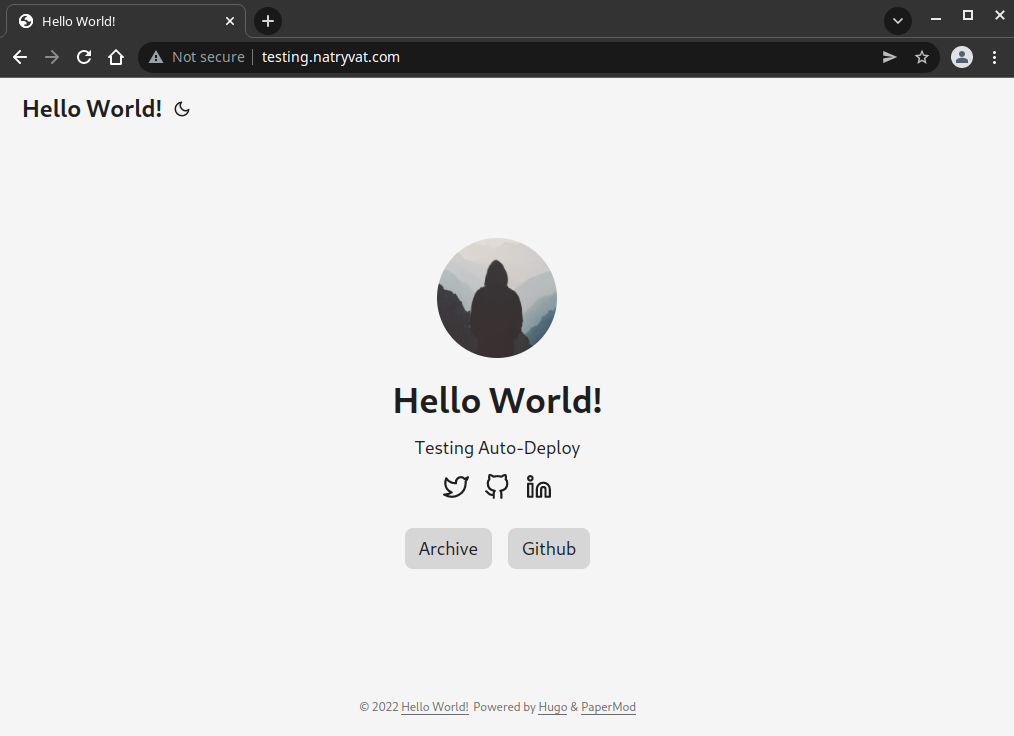 Website hosted.
From now on, any change pushed to the master branch (or any other configured in the deploy-site.yaml) should trigger GitHub actions and then due to the webhook, the shared hosting will update the website hosted, all automatically.
Every time this process is triggered, a new action is created. In the same section of the reporitory we can see the details and can be used to debug if needed:
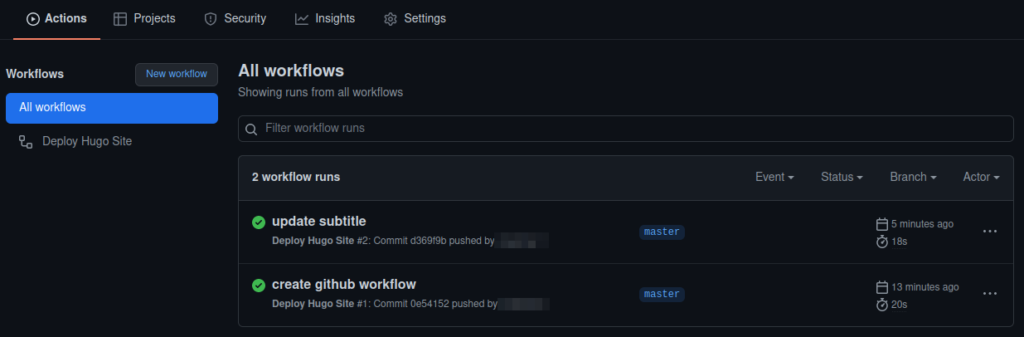 Workflows created in repository.
Update content example
Changing source code, commit the changes and pushing to GitHub repository:
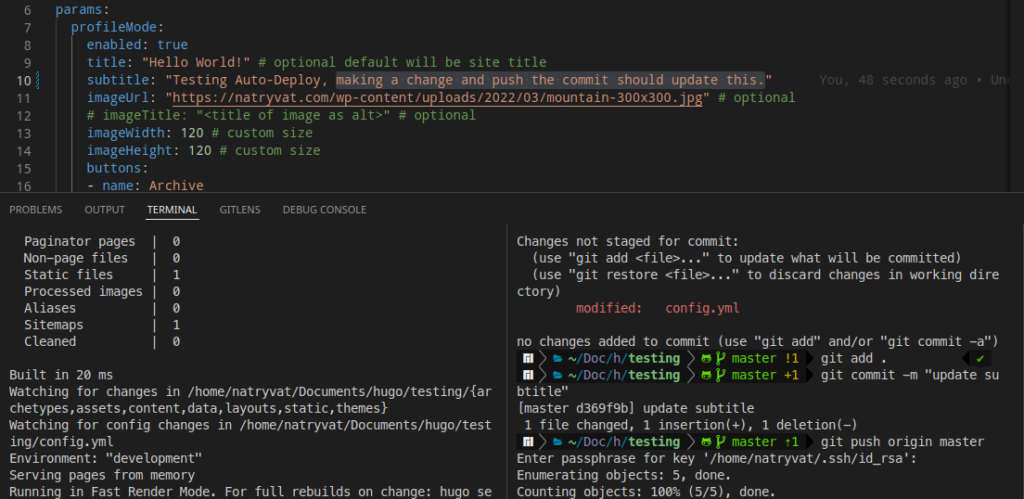 Making change to code.
Checking website again:
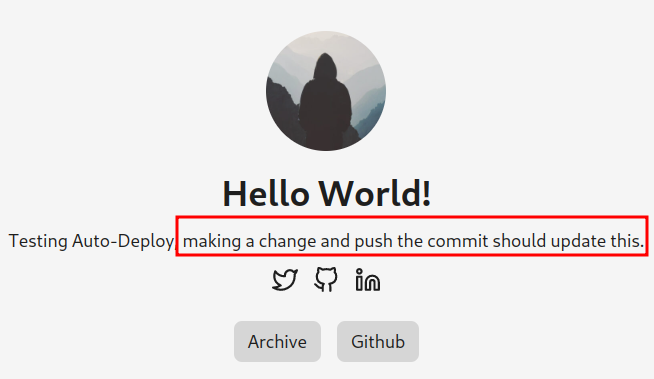 Updated website.
Thanks for reading.