This room is a summary of the main functions of Autopsy, a tool for digital forensics. We are given with a Virtual Machine which has installed autopsy and some files previously scanned and some ingest modules were ran for our convenience, so we are ready to make an analysis and answers some questions.
The first we have to do is to start the Virtual Machine instance. Once started we can see a Windows desktop in which we can see the Autopsy tool and a folder called “Case Files”. We open Autopsy and wait for it to open.
 Windows desktop with autopsy.
Now we are prompted with a window which give us different options options: “New case“, “Open Recent Case” and “Opening Case“. For this room, as we are given with a folder with recent scanned disk we choose the third one.
We search for the “aut” files, which serves as a database file for autopsy. We look for “Tryhackme.aut” file, which it’s on “Case Files” folder on the desktop:
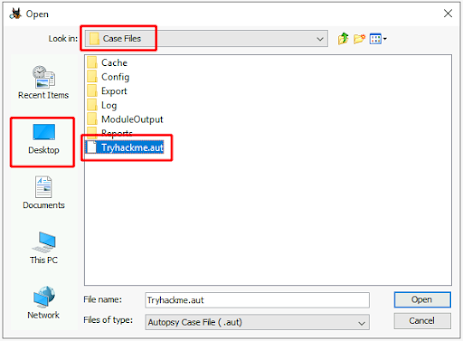 Importing “Tryhackme.aut” file.
Next, we are asked to provide “HASAN2.EO1” path as we were previously warned in the room description, so we just press “Yes” in the pop-up and select the disk image in the same folder as before:
 Importing “HASAN2.E01” file.
After selecting the disk Autopsy finally gets opened and we can see its interface:
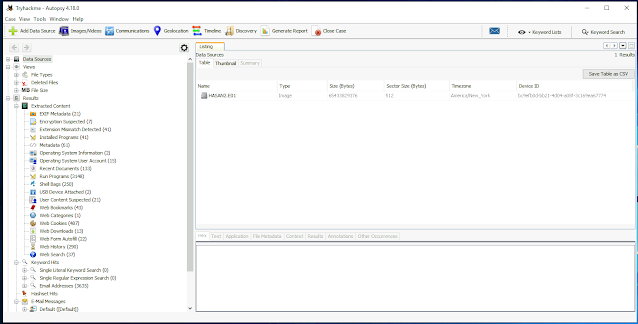 Autopsy interface.
Questions
In this section I will explain the steps I followed to answer every question in the room.
– What is the MD5 hash of the E01 image?
We can get it by selecting the image in the “Data Sources” section, then going to “Summary” and then “Container“. Here we can see some information about the image, including the MD5 hash of the image:
– What is the computer account name?
Under “Results” section we can find “Operating System Information“, where we can find two files, in the “SYSTEM” file we can see the name we are looking for:
– List all the user accounts. (alphabetical order)
As we are asked for the user account, it makes sense to search in the “Operating System User Accounts“. In this case we got all the system accounts, what we need to do is to search for those accounts that belongs to the “SAM” source file, which corresponds to user accounts, and discard those that are system default accounts, we can also order the usernames by name:
– Who was the last user to log into the computer?
Without leaving the last question section, we can find the last user log into the system by order the users by “Date Accessed“:
– What was the IP address of the computer? and What was the MAC address of the computer? (XX-XX-XX-XX-XX-XX)
These two questions can be answered in a single file. I was searching where we could find IP and MAC Addresses and found that the “irunin.ini” file can stored it, but this is only when a monitoring tool called “Look@LAN” is installed, and it was as checked on program files. So we can find that info among other under:
Vol3 (NTFS… ) > Program Files (x86) > Look@LAN > irunin.ini
There we can find “LANIP” and “LANNIC” variables. In the case of the MAC address you need to give the desired format:
– Name the network cards on this computer.
Microsoft Docs says the following about Registry Hives: “A user’s hive contains specific registry information pertaining to the user’s application settings, desktop, environment, network connections, and printers.”
This means that we could find the network adapters info there, more specifically in the “SOFTWARE” hive, for windows settings and its hardware. The hives are stored in:
Vol3 (NTFS… ) > Windows > System32 > config
And the network cards info, in:
SOFTWARE > Microsoft > Windows NT > Current Version > NetworkCards
There we can select the “Description” file to get the answer to the question:
– What is the name of the network monitoring tool?
This question is easy, if we answer the IP and MAC address question due that the tool the help us to find them, is a monitoring tool. We can verify it’s installed int eh “Installed Programs” section:
– A user bookmarked a Google Maps location. What are the coordinates of the location?
This question is a bit easier, we just need to open the “Web Bookmarks” section and search for the google URL:
– A user has his full name printed on his desktop wallpaper. What is the user’s full name?
This is a more handwork question, we have to search all the users’ wallpapers to find which one has its name written on it. We can find all user’s folders under:
Vol3 (NTFS …) > Users
From there, we need to check the wallpaper path for all users:
[Username] > AppData > Roaming > Microsoft > Windows > Themes
And then preview the “TranscodedWallpaper“, which is copy of the user’s wallpaper.
– A user had a file on her desktop. It had a flag but she changed the flag using PowerShell. What was the first flag?
Similar as in the previous question, we need to verify the Powershell history for all users:
Vol3 (NTFS …) > Users
From here, we need to go to:
[Username] > AppData > Roaming > Microsoft > Windows > PowerShell > PSReadLine > ConsoleHost_History.txt
This file contains PowerShell history, and once there we can see the commands/procedures executed, there we can see the content of the file on desktop:
Actually we can verify the the content of the file corresponds to the content changed in the PowerShell history:
– The same user found an exploit to escalate privileges on the computer. What was the message to the device owner?
For answer this questions we have two options, remember, the exploit belongs to the same user of the last question:
1. In the last screenshot of the last question, we can see there is a file in desktop, called “exploit.ps1“, that seems suspicious:
2. Under
[Username] > AppData > Roaming > Microsoft > Windows
We can see a folder called “Recent“, we can take a look to see if there is something suspicious there. We can find a file called “exploit.lnk“, which is an direct access to a file in desktop, the same we saw before:
To see its contents just need to click on it, and we can see the flag:
– 2 hack tools focused on passwords were found in the system. What are the names of these tools? (alphabetical order)
This is an analysis in depth question. What we need to do first is to find any well known tool used in password attacks and then search another tools that could be used at the same time, by the same user or from an unique path.
We can go to “Recent Documents” and verify what is every file in there, there is actually a very common tools used in password attacks.
Once it is identified we can go to “Run Programs” and identify if the tool was executed and by whom. Then we could check for suspicious tools executed almost at the same time that the first one. there are to close if we sort by username and Date/Time.
*NOTES:
Putting some screenshot would lead to a direct hint to answer.
I have to say that this is a hard question for someone who doesn’t know about password tools, but you could verify each executed file and eventually you will find the suspicious ones.
– There is a YARA file on the computer. Inspect the file. What is the name of the author?
We have different options to get answered this question:
1. We can search in all recent files of all users, until find a YARA file:
2. Knowing that the YARA files contain the keyword “rule” on in, we can search for it in the built-in searcher on autopsy:
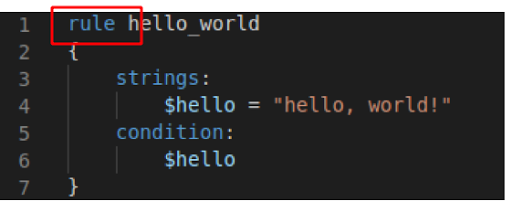 YARA file example.
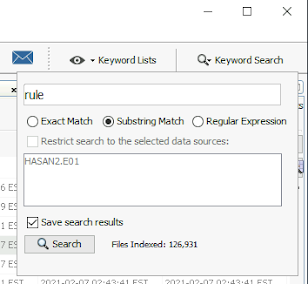 Autopsy search.
3. We also know that the YARA files have the “.yar” extension, so we could search for it in the “File Search by Attributes” feature:
Any of last options will lead us to find the file. Once found we just need to search for its author inside it:
– One of the users wanted to exploit a domain controller with an MS-NRPC based exploit. What is the filename of the archive that you found? (include the spaces in your answer)
First of all, if we google “MS-NRPB exploit” we can find about something called “zerologon“. Reading a bit about this, we can realize this vulnerability is very well-know:
So, we could search in autopsy, and wait for a file that might contain that string and and Voila!
Conclusions
Maybe there are many ways (and better) to get the questions answered, I just tried to face the questions with basic knowledge of the tool. I would appreciate recommendations about the tool and process in general.
I didn’t showing any plain text answer, the intention of this blog is to show the steps followed to solve it and encourage you to do it by yourself.
This was a great summary of Autopsy’s features, a great tool for digital forensics. This gave us not just autopsy training but also knowledge of some windows features.